About Me

My photo
I make toys for kids who don't want to grow up. I'm on the lookout for new projects. If you're interested in commissioning me to build something ridiculous, shoot me an email.

Tuesday, April 2, 2024

Starship Troopers Mobile Infantry Armor Part One: Masters, Molds, and Casting

Ever since the movie debuted, I've had the Starship Troopers Mobile Infantry costume on my cosplay bucket list.  When the production-used props and costumes went up for auction I didn't get wind of it until well after all of the bidding was over and there was no way I could get any for myself.  

Then, b
ack in 2019, my Southern California based friend J.P. Pollio lent me his screen-used set of Starship Troopers armor so I could use it as a template to make replicas of my own.  The plan was to build a whole squad of Mobile Infantry troopers in time for San Diego Comic Con that year.


Of course, we were also making our Sisters of Battle squad and that build ended up overtaking everything else in the world while I was screaming toward the deadline.

So the Starship Troopers gear stayed in the box and when I asked J.P. if he wanted it back when we were all in San Diego, even though I hadn't gotten around to making my copies.  He said he wasn't worried about it.  We'd just go ahead and do a squad cosplay next year.

Then, in the beginning of the next year, the world came to a sudden, screeching halt.  With the COVID-19 pandemic in full swing, big, crowded events like San Diego Comic Con, already a notorious haven for the spread of viruses of all kinds, were cancelled or postponed in the interest of public health.  It would be two years before the full-scale event would happen in person again.  In that time, since nobody was going out in costume to any events, the box of screen-used armor sat on the shelf and was largely forgotten.

Then, in 2023, J.P. asked if I could hand it off to him when we met up at Wondercon in Anaheim.  "No problem," says I, "I'll go load it into the car now."  Then I loaded it into the car.

We caught up several times over the course of that event and each time I say him I said, "let's go grab your box," and he'd say something like, "we'll get to it."

Then we didn't get to it.  I was halfway through the six-hour drive home when it occurred to me that his box was still in the car.

So this year, about a month before Wondercon, J.P. asks if I can bring it back again.  This time, since I wasn't too too busy, I'd have time to make my own masters based on exacting measurements of the original parts and still be able to get him back his stuff.

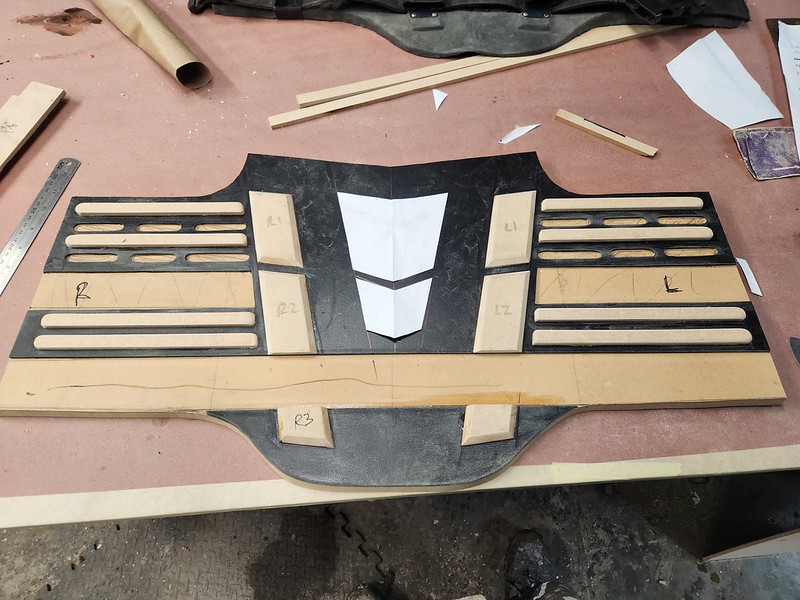
I started by making a copy of the lower back plate out of 1/2" MDF with some 1/4" MDF details layered on top:

Backplate progress

Each of the little raised blocks was cut using the jigsaw and/or scrollsaw, then beveled on the disc sander or whittled to the right angle by hand in the case of the sides with inside corners.

Fully assembled and glued together, the lower back looked like so:
Backplate progress

To minimize the time spent sanding and filling the edges, the bevels were soaked with a tiny bit of thin CA glue in order to seal them up:
Backplate progress

Here's a comparison shot showing my MDF master alongside the screen-used back plate:
Backplate progress

Here I am being all smug and self-satisfied about it:
Smug Satisfaction

The edges were blended in a bit more using some glazing and spot putty:
Backplate progress

After a couple of rounds of putty and sanding, I was pretty happy with it:
Backplate progress

It would go on to receive two or three coats of grey primer:
Backplate progress

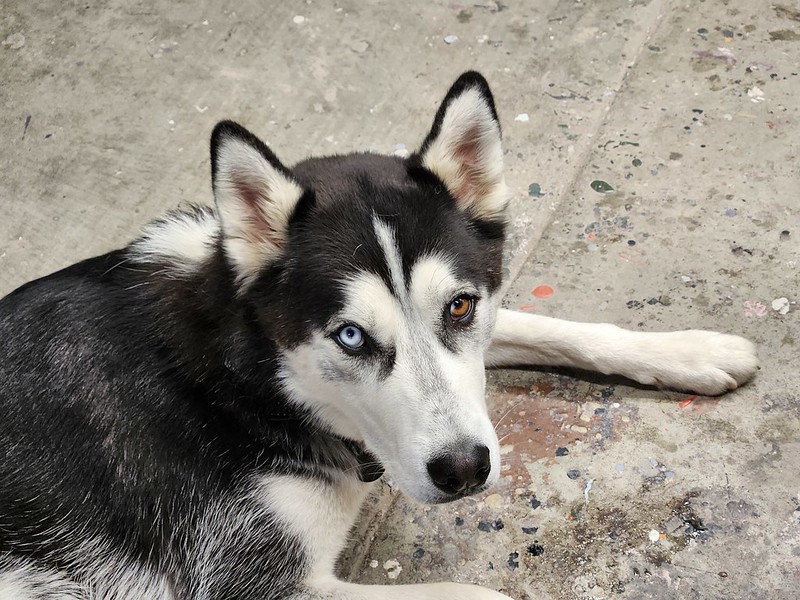
At this point, I was thrilled with the progress.  Geri the Husky* was not impressed:
20240216_191134

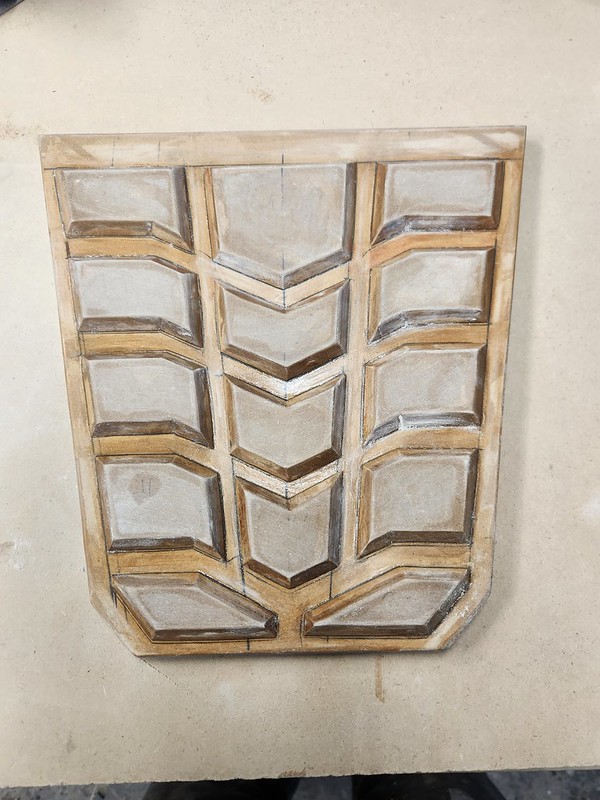
The waist section was a tiny bit more complicated to make.  I still started with the overall shape in 1/2" MDF, but then I also added a layer of 1/8" foamed PVC to get the recesses I needed before adding the raised details in 1/4" MDF:
Waist Section Progress

Here it is after the first coat of primer:
Waist Primed

And alongside the screen-used pieces:
Comparison Shot 2

The collar, or shoulder piece was done in the same manner.  It was made more difficult by the fact that I didn't want to undo the seam at the left shoulder, so I had to do a bit of creative stretching and bending it to determine the exact shape of the overall outline:
Chest armor masters begin

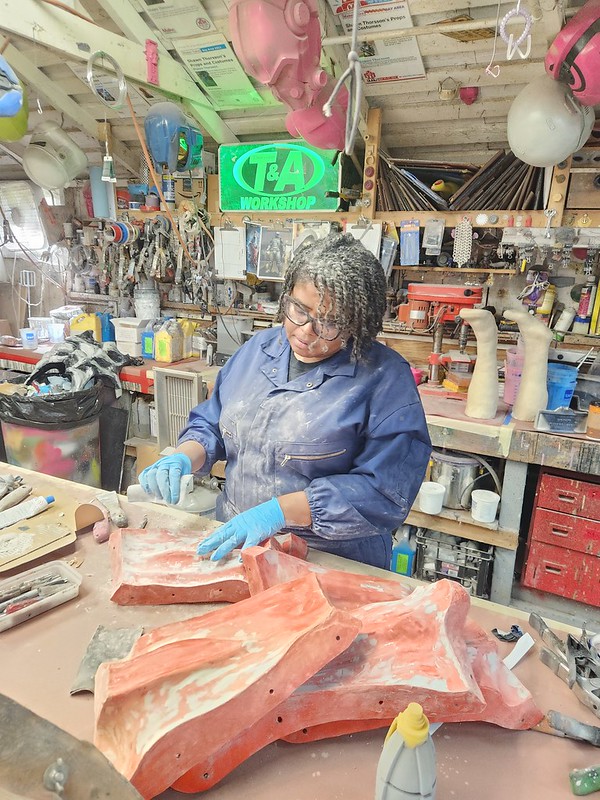
Here's Rachel doing the last round of filling and sanding to smooth out the fully-build shoulder/chest section:
Rachel Prepping MI Collar Armor Master

With all three parts in primer, things were looking pretty good:
SST Armor Masters Primed

Then they'd get a couple of coats of shiny lightish read paint:
Gloss Coat for the Mobile Infantry Armor Masters

And there they were left to dry for a couple of days to ensure the paint wouldn't affect the mold rubber at all.  Shiny:
Shiny and Pink

Geri the Husky* was still unimpressed:
Geri Hiding from a Motorcycle

Since there was no way to make the MDF parts wearable, would have to make a mold and cast them in something else.  The first step in moldmaking was to mount each piece onto a flat board and build a cardboard wall around the part, leaving about an inch of margin all the way around the edges:
Mobile Infantry Armor Molding

All three pieces were set up this way:
Mobile Infantry Armor Molding

Then it was just a matter of mixing up a metric butt-ton of silicone rubber and pouring the molds:
Pouring Silicone for Mobile Infantry Armor

The table was shimmed to make it all sit perfectly level while the rubber cured overnight:
Mobile Infantry Armor Molding

The following morning, I removed the rubber molds from the parts:
MI Armor Molds Peeling off of Masters

The parts themselves were cast in Flex Foam-it 15 "Tuff Stuff" from Smooth-On.  I like this material because it is self skinning, so I wouldn't have to put a layer of rubber into the molds like they did when they made the original props for the film.  

I figured I'd have to paint the final cast parts to get the exact right color, but in order to make any scuffs or scratches in the paint a bit less noticeable, I also tinted the foam by adding a bit of UV black, green, and brown to part B before mixing in part A: 
Adding Colorant to Foam

To ensure adequate mixing and give it additional aeration to encourage expansion a bit, I mix the foam with a mechanical mixer for a solid 20 seconds making sure to scrape the sides of the container with the mixer to blend in any residue of part A or part B clinging to the sides:
Mixing Foam

Then it's on to pouring the foam into the mold:
Pouring Foam 1

In order to make sure there are no visible voids at the edges, I start by pouring along the edges first:
Pouring Foam 2

Then I finish by pouring whatever's left in the bucket over the open field in the middle of the mold:
Pouring Foam 3

As long as I've mixed the right amount of foam, it will expand to fill the whole mold, but if there's going to be any parts that are missing a bit of thickness, it'll be better to have them somewhere in the middle where nobody can see them.

As the foam begins to expand, I lay a piece of stretch knit fabric over the top:
Laying in Fabric Reinforcement 1

This is basically T-shirt fabric that I'm using to reinforce the rubber:
Laying in Fabric Reinforcement 2

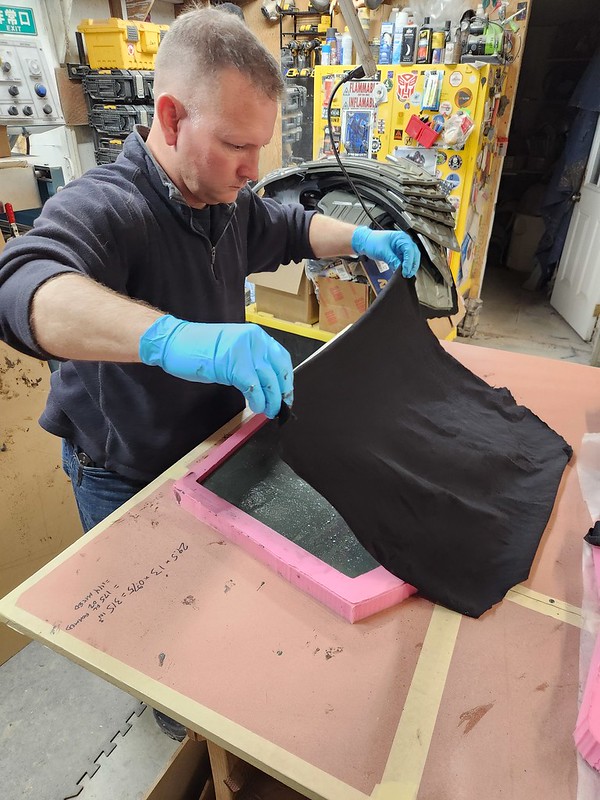
This particular foam that I'm using is pretty durable stuff, but since the strap brackets will be riveted on later, I need to give the rivets and washers something a big more substantial to grab onto.  

Once the fabric is laid in place and wrinkle free, I cover it with wax paper:
Covering with Wax Paper

This is my last chance to make sure there are no wrinkles in the backing fabric:
Checking For Straightness


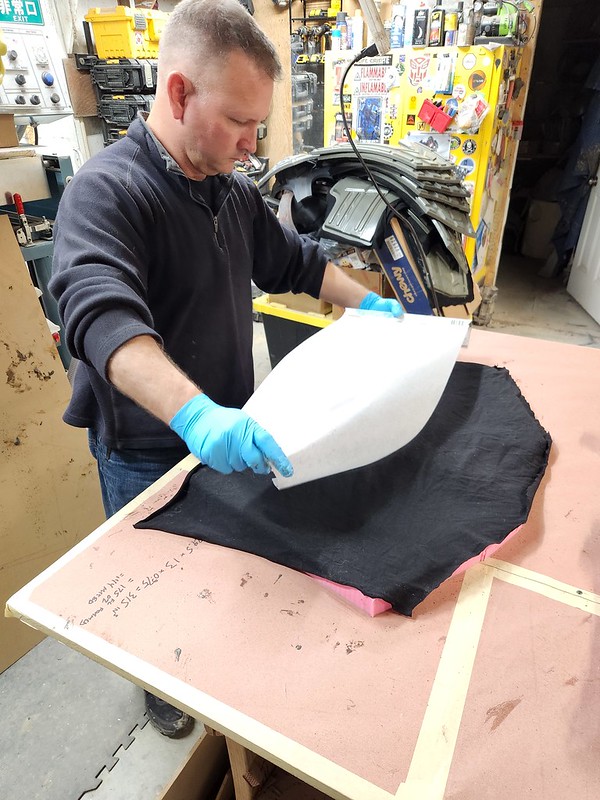
The wax paper ensures that any foam that gets forced through the weave of the fabric as it's expanding won't glue itself to the board that I lay on top for back pressure:
MDF Board for Back Pressure

To keep the foam from overflowing the edges of the mold as it expands and help it lock into the fibers of the fabric, I place sandbags on top of the board:
Adding Sandbags for Additional Pressure

Lots of sandbags:
Lots of Sandbags

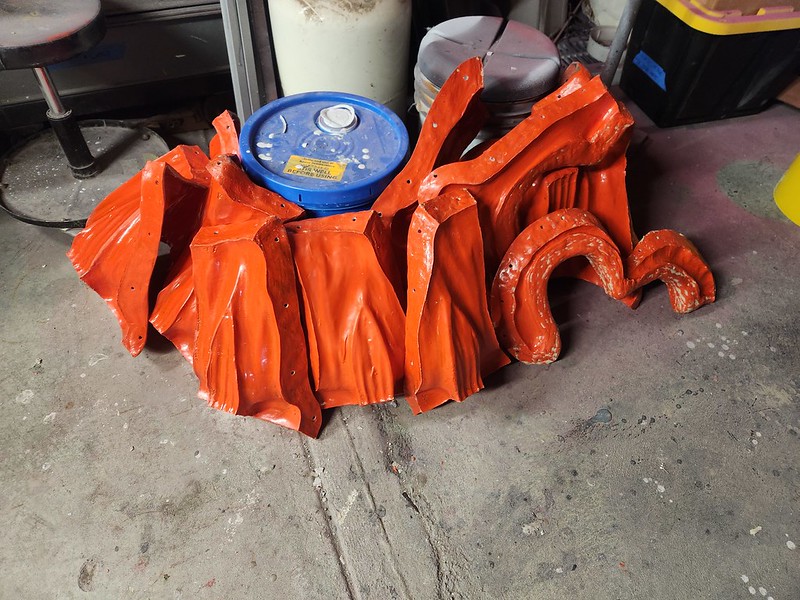
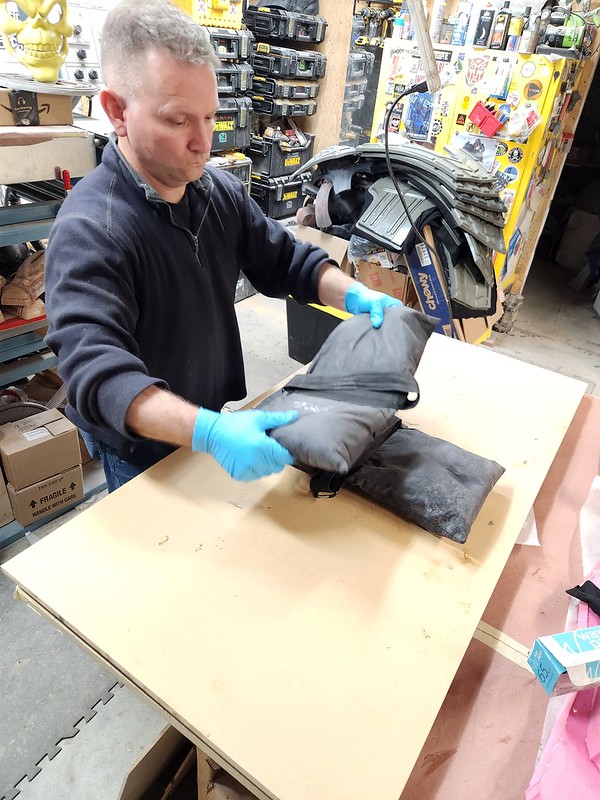
After about 90 minutes, the foam has cured and the part can be de-molded:
Chest demolding

My coloration isn't a perfect match for the screen-used part, but I'm pretty happy with it:
20240326_192009

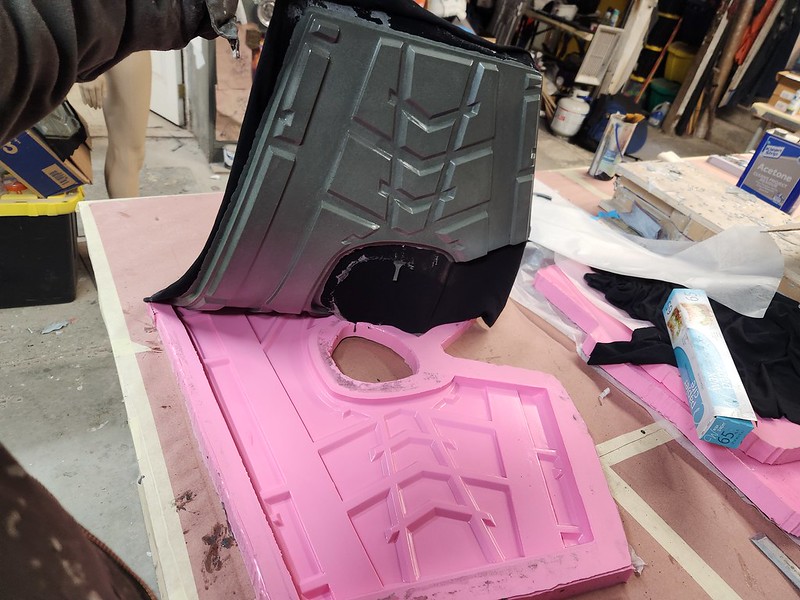
Of course, when I throw it on the pile of castings, I can see how variable my coloration method is:
Chest demolding

Besides, the parts will end up being painted anyway.

Unable to stay patient, I decided to trim the edges of the parts and do a quick test fitting using gaff tape as a stand-in for the strapping:
First flexfoam casts

I definitely feel like I'm on the right track:
First flexfoam casts

Geri the Husky* is still not impressed:
Bored Geri

In my next post about this project I'll detail the assembly of the cast parts and all of their strapping and rigging.  The current goal is to have at least a few of these guys walking around together at San Diego Comic Con this year.

Also, for those of you wondering, J.P. has been reunited with his screen-used armor and spent Sunday at Wondercon in Anaheim sporting it with pride.

Stay tuned...

*Geri (pronounced a lot like "Gary" with a Norse accent) was one of Odin's two wolves.  The other one was named Freki.  I'm not sure which one was the female, but sooner or later I'll have the other half of the set.

Monday, April 1, 2024

Genestealer Update 10

Nothing to report this week.  The project was largely untouched while I scrambled on a few other things and left for half of the week to attend Wondercon in Anaheim, CA.

We'll dive back in this week.   Genestealer Arms Test Fit Back Left

It does seem like Jeff was making some progress on the digital side of things though:
RAWR!

Stay tuned...

Wednesday, March 20, 2024

Genestealer Update 9: Assembling the Arms and Laying up the Back

 When I posted the last update I had a big pile of untrimmed, vacformed arm pieces like so:

Rough Trimmed Arm Parts Stack

So I set to work trimming the edges and getting them glued together.  I also set Jeff to work on some of the rough trimming and cutting:
Jeff Trimming Genestealer Arm Parts

Once the edges were cut, the next step was to clamp them to their adjoining pieces either overlapping the margins or butting them together with a piece of scrap clamped behind them like so:
Bicep Seam Glued

The magnets were used along the edges were I couldn't reach with the clamps.

Once everything was securely clamped, a tiny amount of Weld-On #4 solvent adhesive was dripped into the seam.
Tricep Seam Glued

Capillary action wicks the solvent into the tiny space between the clamped parts and everywhere it touches it dissolves the plastic a little bit.  As the solvent dries out, the plastic becomes solid again, but now it's all one part:
Genestealer Forearm Clamped for Gluing

So, tinkering in the background over a couple of days in between projects, the arms start to come together:
Genestealer Arm Parts in Progress

Here's one complete set of arms for one genestealer:
Full set of Genestealer arms

They'll look pretty good in paint.

Meanwhile, last time I posted about the back piece, the mold looked like so:
Genestealer carapace mold sections cleaned

As usual, there were tiny flaws in the surface, so we started by giving them a quick sanding.  Here's Tia working on one of the particularly problematic parts:
20240314_150237

A couple of days later, I found a few minutes to finish up the wet sanding of the parts prior to waxing them:
Mold Polishing

Each segment was given three judicious coats of wax.  To speed the wax drying between coats, the parts were placed in front of the big circular fan:
Force Drying the Molds

After waxing and coating with PVA mold release, the parts were bolted back together and a layer of grey gelcoat was applied to the inside:
Mold with Gelcoat Laid In

It's a pretty good-looking mold.  Look at it:
LOOK AT IT!

With the gelcoat applied, the mold was set face-down to cure:
Gelcoated Mold Left Overnight

First thing the next morning, I laid up the fiberglass inside.  With all of the curves and corners, it was a tricky part to lay up while also keeping it lightweight:
First Back Pulled from the Mold Top Left

Here's another shot after I'd peeled off all of the release agent:
First Back Pulled from the Mold Back Left

And the nice, clean inside which I'm very proud of:
First Back Pulled from the Mold Front

Here it is again, weighing almost nothing:
First Back Pulled From Mold

After trimming the edges and cutting out the windows where the fleshy bits will be exposed, I did a quick fitting for the arm pieces with some gaff tape:
Genestealer Arms Test Fit Back Right

Since I had it all set up anyway, I couldn't resist the urge to try it on:
Genestealer Arms Test Fit Front Crouch

It'll be interesting once I have all of the weight of the head out in front, but for right now it's pretty easy to carry around:
Genestealer Arms Test Fit Hunched Front Right

I'm probably going to make up a backplate for the upper body to slot onto once we get the chest molded.  That way I can give the whole thing a rigid mounting system.  It'll be interesting working out a way to balance the weight on the nose and still keep some agility in the waist:
Genestealer Arms Test Fit Crouched Right

Still, this critter is going to be a lot of fun to perform in:
Genestealer Arms Test Fit Front Wave

For now, here it sits while I work out how I want the chest to work:
Genestealer Arms Test Fit Front Left

I'm thinking I'll split off the sections that to under the lower arms and make the rest of the chest attach permanently to the back.  This will provide better strength and simplify the process of getting it on and off.

Stay tuned...